Text Area in HTML
HTML, or HyperText Markup Language, is the backbone of web development, providing the structure and content for websites. Within the realm of HTML, various elements serve different purposes, and one such element that plays a crucial role in user interaction is the <textarea> element. The <textarea> element is used to create a multi-line text input field, allowing users to enter and edit larger amounts of text. In this article, we will explore the syntax, attributes, and practical applications of the <textarea> element.
Syntax:
The basic syntax for the <textarea> element is straightforward:
Code:
<textarea rows="4" cols="50">

 Enter your text here...

</textarea>
Let's break down the key components:
- <textarea>: This is the opening tag of the element.
- rows="4": This attribute determines the number of visible rows for the textarea.
- cols="50": This attribute specifies the number of visible columns for the textarea.
- Enter your text here...: This is the default content or placeholder text within the textarea.
- </textarea>: This is the closing tag of the element.
Attributes:
1. Rows and Columns:
The rows and cols attributes allow developers to define the visible size of the textarea. These attributes help create a specific structure for the input field, giving users a visual indication of the expected length and width of their input.
Code:
<!DOCTYPE html>

<html lang="en">

<head>

    <meta charset="UTF-8">

    <meta name="viewport" content="width=device-width, initial-scale=1.0">

    <title>JTP</title>

    <style>

        body {

            font-family: 'Arial', sans-serif;

            background-color: #f2f2f2;

            padding: 20px;

        }

        textarea {

            width: 100%;

            padding: 10px;

            margin: 10px 0;

            box-sizing: border-box;

            border: 1px solid #ccc;

            border-radius: 5px;

            font-size: 14px;

            resize: vertical;

            /* Allows vertical resizing */

        }

    </style>

   </head>

<body>

    <textarea rows="4" cols="50" placeholder="Enter your text here..."></textarea>

</body>

</html>
Output:

2. Placeholder:
The placeholder attribute allows developers to provide a hint or example text that appears in the textarea before the user enters any content. This can be particularly useful for guiding users through what type of information is expected.
Code:
<!DOCTYPE html>

<html lang="en">

<head>

    <meta charset="UTF-8">

    <meta name="viewport" content="width=device-width, initial-scale=1.0">

    <style>

        body {

            font-family: 'Arial', sans-serif;

            background-color: #f4f4f4;

            margin: 0;

            padding: 0;

            display: flex;

            justify-content: center;

            align-items: center;

            height: 100vh;

        }

        textarea {

            width: 100%;

            padding: 10px;

            box-sizing: border-box;

            border: 1px solid #ccc;

            border-radius: 5px;

            font-size: 14px;

            resize: vertical;

            /* Allows vertical resizing */

        }

        ::placeholder {

            color: #999;

            /* Placeholder text color */

        }

    </style>

</head>

<body>

    <textarea rows="4" cols="50" placeholder="Enter your text here..."></textarea>

</body>

</html>
Output:

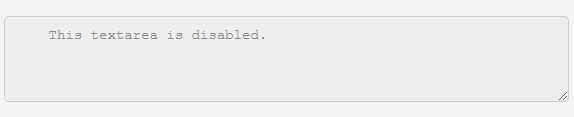
3. Disabled:
The disabled attribute makes the textarea uneditable. This is useful when you want to display information to the user but want them to keep the content the same.
Code:
<!DOCTYPE html>

<html lang="en">

<head>

    <meta charset="UTF-8">

    <meta name="viewport" content="width=device-width, initial-scale=1.0">

    <title>JTP</title>

    <style>

        body {

            font-family: 'Arial', sans-serif;

            background-color: #f4f4f4;

            margin: 0;

            padding: 0;

            display: flex;

            justify-content: center;

            align-items: center;

            height: 100vh;

            padding: 0 20px;

        }

        textarea {

            width: 100%;

            padding: 10px;

            box-sizing: border-box;

            border: 1px solid #ccc;

            border-radius: 5px;

            font-size: 14px;

            resize: vertical;

            /* Allows vertical resizing */

        }

        textarea[disabled] {

            background-color: #eee;

            /* Disabled textarea background color */

            color: #888;

            /* Disabled textarea text color */

        }

    </style>

</head>

<body>

    <textarea rows="4" cols="50" disabled>

    This textarea is disabled.

  </textarea>

</body>

</html>
Output:
 Practical Applications:
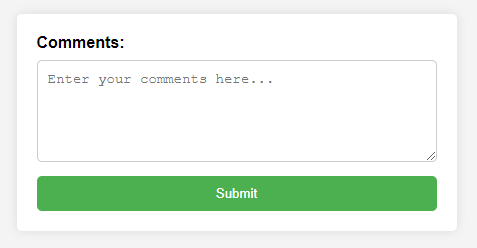
1. Form Inputs:
The <textarea> element is commonly used within HTML forms, especially when users need to provide detailed comments, feedback, or other multiline inputs.
Code:
<!DOCTYPE html>

<html lang="en">

<head>

    <meta charset="UTF-8">

    <meta name="viewport" content="width=device-width, initial-scale=1.0">

    <title>JTP</title>

    <style>

        body {

            font-family: 'Arial', sans-serif;

            background-color: #f4f4f4;

            margin: 0;

            padding: 0;

            display: flex;

            justify-content: center;

            align-items: center;

            height: 100vh;

        }

        form {

            width: 80%;

            max-width: 400px;

            background-color: #fff;

            padding: 20px;

            box-shadow: 0 0 10px rgba(0, 0, 0, 0.1);

            border-radius: 5px;

        }

        label {

            display: block;

            margin-bottom: 8px;

            font-weight: bold;

        }

        textarea {

            width: 100%;

            padding: 10px;

            box-sizing: border-box;

            border: 1px solid #ccc;

            border-radius: 5px;

            font-size: 14px;

            resize: vertical;

            /* Allows vertical resizing */

        }

        input[type="submit"] {

            display: block;

            width: 100%;

            padding: 10px;

            margin-top: 10px;

            background-color: #4CAF50;

            color: #fff;

            border: none;

            border-radius: 5px;

            cursor: pointer;

        }

    </style>

</head>

<body>

    <form action="/submit" method="post">

        <label for="comments">Comments:</label>

        <textarea id="comments" name="comments" rows="5" cols="40" placeholder="Enter your comments here..."></textarea>

        <input type="submit" value="Submit">

    </form>

</body>

</html>
Output:
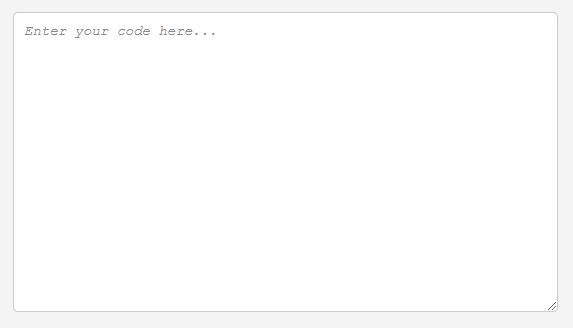
2. Code Editors:
Online code editors often utilize the <textarea> element to allow users to input and edit code. The larger space provided by a multiline textarea makes it suitable for viewing and manipulating code snippets.
Code:
<!DOCTYPE html>
<html lang="en">

<head>

    <meta charset="UTF-8">

    <meta name="viewport" content="width=device-width, initial-scale=1.0">

    <title>JTP</title>

    <style>

        body {

            font-family: 'Arial', sans-serif;

            background-color: #f4f4f4;

            margin: 0;

            padding: 0;

            display: flex;

            justify-content: center;

            align-items: center;

            height: 100vh;

            padding: 0 30px;

        }

        textarea {

            width: 100%;

            height: 300px;

            /* Adjust the height as needed */

            padding: 10px;

            box-sizing: border-box;

            border: 1px solid #ccc;

            border-radius: 5px;

            font-family: 'Courier New', monospace;

            /* Use a monospaced font for code */

            font-size: 14px;

            resize: vertical;

            /* Allows vertical resizing */

        }

        textarea::placeholder {

            font-style: italic;

            color: #888;

        }

    </style>

</head>

<body>

    <textarea id="codeEditor" rows="10" cols="80" placeholder="Enter your code here..."></textarea>

</body>

</html>
Output:
 Additional Features and Styling:
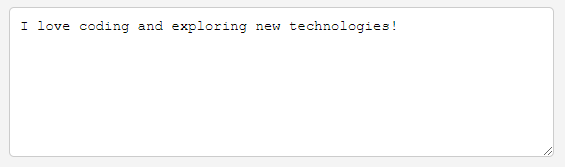
1. Value Attribute:
The value attribute allows developers to set an initial value for the textarea. This can be handy when you want to pre-fill the textarea with default content.
Code:
<!DOCTYPE html>

<html lang="en">

<head>

    <meta charset="UTF-8">

    <meta name="viewport" content="width=device-width, initial-scale=1.0">

    <title>JTP</title>

    <style>

        body {

            font-family: 'Arial', sans-serif;

            background-color: #f4f4f4;

            margin: 0;

            padding: 0;

            display: flex;

            justify-content: center;

            align-items: center;

            height: 100vh;

            padding: 0 30px;

        }

        textarea {

            width: 100%;

            height: 150px;

            /* Adjust the height as needed */

            padding: 10px;

            box-sizing: border-box;

            border: 1px solid #ccc;

            border-radius: 5px;

            font-size: 14px;

            resize: vertical;

            /* Allows vertical resizing */

        }

        textarea::placeholder {

            color: #888;

        }

    </style>

</head>

<body>

    <textarea id="bio" name="bio" rows="6" cols="30"

        placeholder="Tell us about yourself...">I love coding and exploring new technologies!</textarea>

</body>

</html>
Output:
2. Maxlength:
The maxlength attribute specifies the maximum number of characters that a user can input into the textarea. This is useful when you want to limit the length of user-generated content.
Code:
<!DOCTYPE html>

<html lang="en">

<head>

    <meta charset="UTF-8">

    <meta name="viewport" content="width=device-width, initial-scale=1.0">

    <style>

        body {

            font-family: 'Arial', sans-serif;

            background-color: #f4f4f4;

            margin: 0;

            padding: 0;

            display: flex;

            justify-content: center;

            align-items: center;

            height: 100vh;

            flex-direction: column;

            gap: 30px;

            padding: 0 30px;

        }

        textarea {

            width: 100%;

            height: 100px;

            /* Adjust the height as needed */

            padding: 10px;

            box-sizing: border-box;

            border: 1px solid #ccc;

            border-radius: 5px;

            font-size: 14px;

            resize: vertical;

            /* Allows vertical resizing */

        }

        textarea::placeholder {

            color: #888;

        }

        #charCount {

            text-align: right;

            color: black;

            margin-top: 5px;

        }

        #charCount.error {

            color: #e74c3c;

            /* Red color for character limit exceeded */

        }

    </style>

   </head>

<body>

    <textarea id="tweet" name="tweet" rows="3" cols="30" maxlength="280" placeholder="Compose your tweet..."></textarea>

    <div id="charCount">Characters left: 280</div>

    <script>

        document.getElementById('tweet').addEventListener('input', function () {

            var charCount = this.value.length;

            var charLimit = 280;

            var remainingChars = charLimit - charCount;

            var charCountElement = document.getElementById('charCount');

            charCountElement.textContent = 'Characters left: ' + remainingChars;

            if (remainingChars < 0) {

                charCountElement.classList.add('error');

            } else {

                charCountElement.classList.remove('error');

            }

        });

    </script>

</body>

</html>
Output:

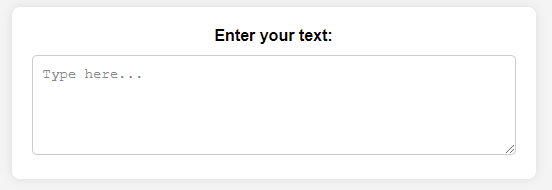
3. Styling with CSS:
Developers can enhance the appearance of <textarea> elements using CSS to style borders, backgrounds, fonts, and more. Customizing the look of textareas can contribute to a cohesive and visually appealing user interface.
Code:
<!DOCTYPE html>

<html lang="en">

<head>

    <meta charset="UTF-8">

    <meta name="viewport" content="width=device-width, initial-scale=1.0">

    <title>JTP</title>

    <style>

        body {

            font-family: 'Arial', sans-serif;

            background-color: #f4f4f4;

            margin: 0;

            padding: 0;

            display: flex;

            justify-content: center;

            align-items: center;

            height: 100vh;

        }

        .container {

            text-align: center;

            width: 80%;

            max-width: 600px;

            background-color: #fff;

            padding: 20px;

            box-shadow: 0 0 10px rgba(0, 0, 0, 0.1);

            border-radius: 8px;

        }

        label {

            display: block;

            margin-bottom: 10px;

            font-weight: bold;

        }

        textarea {

            width: 100%;

            height: 100px;

            padding: 10px;

            box-sizing: border-box;

            border: 1px solid #ccc;

            border-radius: 5px;

            font-size: 14px;

            resize: vertical;

            /* Allows vertical resizing */

        }

        textarea::placeholder {

            color: #888;

        }

    </style>

</head>

<body>

    <div class="container">

        <label for="styledTextarea">Enter your text:</label>

        <textarea id="styledTextarea" rows="4" cols="50" placeholder="Type here..."></textarea>

    </div>

</body>

</html>
Output:
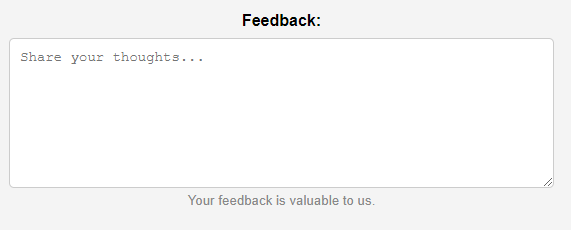
4. Accessibility Considerations:
When using textareas in forms, it's essential to consider accessibility. Providing proper labels using the <label> element and using ARIA attributes can improve the overall accessibility of your forms, ensuring users with disabilities can easily navigate them.
Code:
<!DOCTYPE html>

<html lang="en">

<head>

    <meta charset="UTF-8">

    <meta name="viewport" content="width=device-width, initial-scale=1.0">

    <title>JTP</title>

    <style>

        body {

            font-family: 'Arial', sans-serif;

            background-color: #f4f4f4;

            margin: 0;

            padding: 0;

            display: flex;

            justify-content: center;

            align-items: center;

            height: 100vh;

            flex-direction: column;

            padding: 0 30px;

        }

        label {

            display: block;

            margin-bottom: 8px;

            font-weight: bold;

        }

        textarea {

            width: 100%;

            height: 150px;

            /* Adjust the height as needed */

            padding: 10px;

            box-sizing: border-box;

            border: 1px solid #ccc;

            border-radius: 5px;

            font-size: 14px;

            resize: vertical;

            /* Allows vertical resizing */

        }

        small {

            display: block;

            margin-top: 5px;

            color: #888;

        }

    </style>

</head>

<body>

    <label for="feedback">Feedback:</label>

    <textarea id="feedback" name="feedback" rows="4" cols="50" aria-describedby="feedbackHelp"

        placeholder="Share your thoughts..."></textarea>

    <small id="feedbackHelp">Your feedback is valuable to us.</small>

</body>

</html>
Output:
 Browser Compatibility:
The <textarea> element is widely supported across all modern browsers. However, when working with older browsers, it's crucial to test and ensure proper functionality. Generally, the attributes and features mentioned in this article are well-supported.
Advantages of <textarea> in HTML
1. Multiline Input:
The primary advantage of the <textarea> element is its ability to handle multiline text input. This makes it ideal for scenarios where users need to input or edit larger amounts of text, such as in comment sections or text-based content creation.
2. Versatility:
The <textarea> element is versatile and can be used in various contexts, from simple comment boxes in forms to more complex applications like code editors. Its flexibility makes it suitable for a wide range of user inputs.
3. Easy Integration in Forms:
When designing HTML forms, the <textarea> element seamlessly integrates with other form elements. It provides an efficient way for users to provide detailed comments, feedback, or other lengthy inputs within the context of a form.
4. Customizable:
Developers can easily customize the appearance of textareas using CSS, allowing for consistent styling across a website. This enables a cohesive and visually appealing design, enhancing the overall user experience.
5. Attribute Options:
The <textarea> element comes with various attributes such as rows, cols, placeholder, and maxlength, providing developers with control over the size, initial content, and character limit of the textarea.
Disadvantages of <textarea> in HTML
1. Limited Formatting:
Unlike rich text editors, the <textarea> element is designed for plain text input. It does not support formatting options such as bold, italic, or inline images. For applications requiring more advanced formatting, alternative solutions may be necessary.
2. Potential for Large Inputs:
While the ability to handle multiline input is an advantage, it can also be a drawback. Users may input excessively long text, causing issues with layout and display on the webpage. Developers need to consider and handle such scenarios appropriately.
3. Less Intuitive for Data Entry:
For short, single-line inputs, using an <input> element with the type="text" attribute may be more intuitive for users. Textareas are better suited for scenarios where multiline input is explicitly needed, and using them appropriately can lead to a more streamlined user experience.
4. Accessibility Challenges:
Ensuring proper accessibility for textareas, especially in forms, requires additional considerations. Providing associated labels helpful hints, and ensuring compatibility with screen readers is essential for users with disabilities.
5. Browser Rendering Consistency:
While modern browsers generally support the <textarea> element well, there might be slight variations in rendering across different browsers. Developers should test their implementations thoroughly to ensure a consistent experience for users.
Applications
1. User Input and Forms:
Textareas are commonly used in HTML forms where users need to provide multiline text input. Examples include feedback forms, comment sections, or any situation where users are required to share more detailed information.
2. Comments and Feedback:
One of the primary applications of textareas is in comment sections on blogs, articles, or social media platforms. Users can express their thoughts or provide feedback more extensively compared to a single-line input field.
3. Content Creation and Editing:
Online platforms that involve content creation, such as blogging websites or collaborative writing tools, often use textareas. Users can input and edit articles, blog posts, or any other form of textual content with ease.
4. Code Editors:
Textareas are essential components in web applications that offer code editing functionalities. Whether it's an online code editor, a coding tutorial platform, or a collaborative coding environment, textareas provide a space for users to input and edit code.
5. Survey and Questionnaires:
Textareas are integrated into survey forms where open-ended questions are present. This allows respondents to provide detailed and subjective answers, offering a richer set of data.
6. Address and Contact Information:
In forms where users need to provide their address or contact information, textareas can be used for fields like the address. This provides users with ample space to input multiline information.
7. User Profiles and Biographies:
Websites that allow users to create profiles often include a textarea for users to write and display longer biographies or descriptions about themselves. This allows for a more personal and expressive presentation.
8. Messaging Applications:
While single-line input fields are common in messaging applications, textareas are employed when users want to send longer messages or write detailed notes within the messaging interface.
9. Feedback Surveys and Reviews:
Textareas are used in feedback surveys or review forms where users can share their experiences, criticisms, or suggestions in a more detailed manner compared to single-line inputs.
10. Documentation and Help Centers:
Textareas can be utilized for submitting queries, bug reports, or contributing to website documentation. This helps users provide detailed information when seeking assistance or reporting issues.
11. Educational Platforms:
In educational platforms where students submit assignments or answer essay-type questions, textareas allow for longer and more detailed responses.
12. Blogging Platforms:
Textareas are extensively used in blogging platforms to create and edit blog posts. Authors can use textareas to compose and format their articles, incorporating various styles and media.
13. Wiki Contributions:
Wikis often utilize textareas for users to contribute or edit articles collaboratively. The multiline input allows for the creation of comprehensive and detailed content.
14. Collaborative Document Editing:
Textareas play a role in collaborative document editing tools where multiple users can simultaneously contribute and edit a document. This is common in platforms that facilitate real-time collaboration.
15. Customer Support Chat:
In customer support chat interfaces, textareas allow users to enter detailed information about their issues or inquiries, and agents can use them to provide thorough responses.
16. Online Forums:
Textareas are integral to online forums where users can engage in discussions, ask questions, and share information. The multiline input supports longer and more elaborate forum posts.
17. Product Reviews:
E-commerce websites often include textareas in their product review forms. This enables customers to provide detailed feedback, share their experiences, and offer insights to potential buyers.
Conclusion
The <textarea> element in HTML is a versatile and indispensable tool for creating interactive and dynamic web forms. Its ability to handle multiline text input, coupled with various attributes and styling options, makes it suitable for a wide range of applications.
Whether you are designing a simple comment box or a sophisticated code editor, understanding the features and customization options of the <textarea> element is key to creating a seamless and user-friendly web experience.